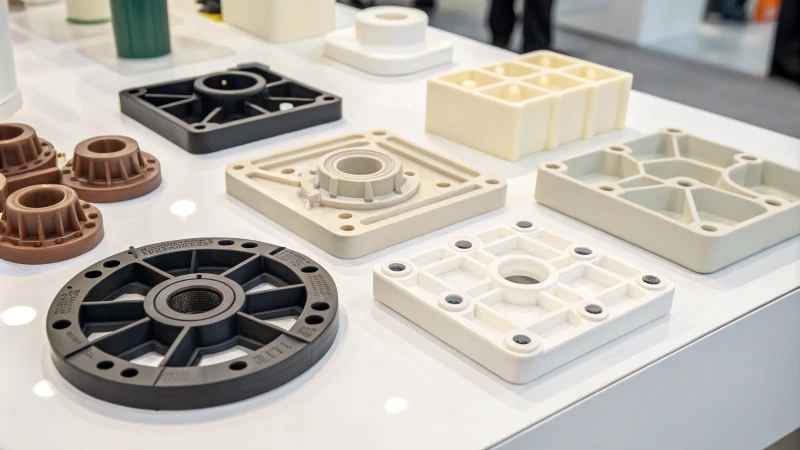
I still remember the first time I saw a plastic part take shape in a mold—it was like watching magic.
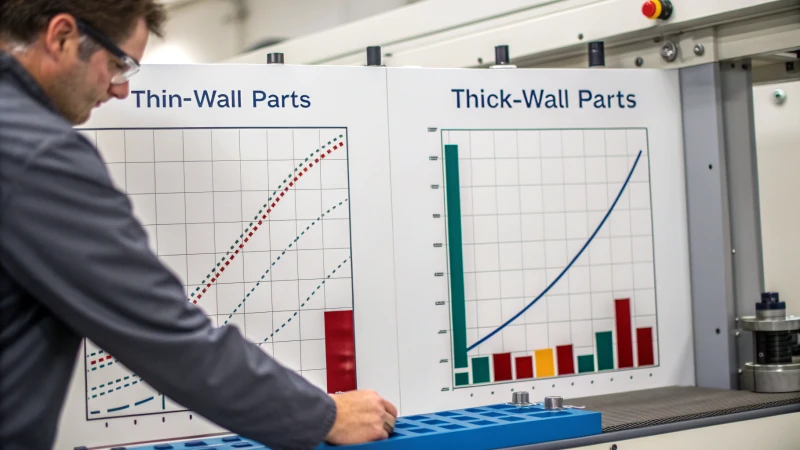
Thin-wall injection molding demands higher pressure and quicker cooling than thick-wall molding, influencing production speed, material selection, and part quality, crucial for optimizing design and manufacturing in industries like electronics.
The nuances between thin and thick walls in injection molding can make all the difference in our work. Let me tell you, navigating these intricacies has been both challenging and rewarding in my career. Thin walls demand more precision with pressure and speed, kind of like trying to catch a fast-moving train. Meanwhile, thick walls allow a bit more leeway but come with their own set of challenges, like ensuring even cooling to avoid any mishaps. Whether you’re juggling design sketches or making on-the-fly adjustments, understanding these distinctions is key to achieving those perfect plastic components.
Thin-wall molding requires higher pressure than thick-wall molding.True
Thin walls need higher pressure to fill molds quickly, ensuring quality.
Thick-wall parts cool faster than thin-wall parts in injection molding.False
Thick walls retain heat longer, leading to slower cooling times.
- 1. How Does Wall Thickness Affect Cooling Rates in Injection Molding?
- 2. What Are the Material Considerations for Thin-Wall and Thick-Wall Molding?
- 3. Why Does Injection Pressure Vary Between Thin-Wall and Thick-Wall Parts?
- 4. What Design Guidelines Should Be Followed for Thin-Wall Parts?
- 5. How do production speeds differ between thin-wall and thick-wall molding?
- 6. What Are the Common Challenges in Molding Thin-Wall Parts?
- 7. Conclusion
How Does Wall Thickness Affect Cooling Rates in Injection Molding?
Have you ever wondered how the thickness of a wall in injection molding could make or break your design?
In injection molding, wall thickness impacts cooling rates: thicker walls extend cooling and cycle times, while thinner walls cool quicker, enhancing efficiency but possibly compromising structural integrity.
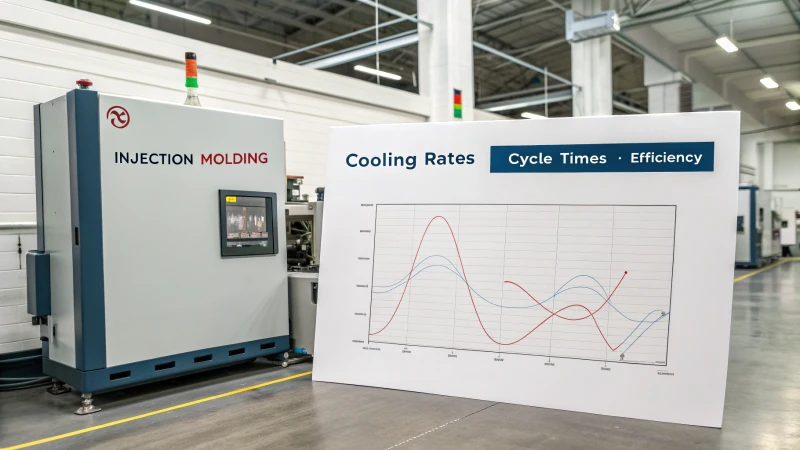
The Science Behind Cooling Rates
Imagine you’re about to pour yourself a cup of hot coffee. You know the thicker your mug, the longer it will take to cool down, right? The same principle applies to injection molding1. When I first started working with molds, I quickly realized that the wall thickness of a mold is like the mug—it determines how long it takes for heat to escape from the molten plastic. A thicker wall means the mold holds onto heat longer, stretching out those cooling periods and adding time to the production cycle.
Balancing Wall Thickness
Finding that sweet spot between wall thickness and cooling rates is a bit like trying to find the perfect coffee temperature—not too hot, not too cold. For folks like me who design molds day in and day out, it’s essential to strike this balance to optimize production without sacrificing quality.
Here’s a table that helps visualize this balance:
| Wall Thickness (mm) | Cooling Time (s) | Impact on Quality |
|---|---|---|
| <2 | <10 | Potential warping issues |
| 2-4 | 10-20 | Optimal balance |
| >4 | >20 | Extended cycle time |
Thin walls cool faster, speeding up production. But beware—go too thin, and you might end up with warped products. I’ve seen it happen and trust me, it’s not pretty.
Material Considerations
I learned the hard way that not all plastics are created equal. The type of material you choose can dramatically affect how wall thickness impacts cooling rates. For instance:
- Polypropylene (PP): Suitable for thin walls due to its high thermal conductivity.
- Acrylonitrile Butadiene Styrene (ABS): Requires careful consideration of wall thickness to prevent defects.
Understanding these nuances can make or break your design decisions. Checking out resources on material properties2 is always a good idea.
Optimizing Mold Design
In my experience, nothing beats the efficiency of simulation software when it comes to fine-tuning your mold designs. Before jumping into creating physical molds, I always use mold flow analysis tools3. They’re like crystal balls for predicting cooling times and making necessary adjustments ahead of time.
Leveraging these tools not only saves resources but also provides insights into how different wall thicknesses can affect overall performance. With these strategies in place, I can ensure smoother production cycles and top-notch product quality.
By understanding these dynamics, I’ve been able to enhance my workflow and deliver designs that stand the test of time—and efficiency.
Thicker walls in molds increase cooling time.True
Thicker walls retain more heat, requiring longer cooling periods.
Polypropylene is unsuitable for thin-walled molds.False
Polypropylene has high thermal conductivity, making it suitable.
What Are the Material Considerations for Thin-Wall and Thick-Wall Molding?
When I first started designing molds, I had no idea how critical material choice could be in thin-wall and thick-wall molding. It was like trying to bake a cake without knowing if I had all the right ingredients.
Material considerations for thin-wall and thick-wall molding include thermal conductivity, shrinkage rate, and melt flow index. Proper material selection prevents defects like warping and ensures optimal performance of molded parts.
Understanding Wall Thickness
I remember the first time I tackled a project involving both thin and thick walls. It was a steep learning curve! In injection molding, wall thickness plays a huge role in determining not just how sturdy a part will be, but also how efficiently it can be produced. Thin-wall molding typically refers to sections under 1 mm, while thick-wall molding usually involves parts over 4 mm.
| Wall Type | Thickness Range | Key Properties |
|---|---|---|
| Thin-Wall | < 1 mm | High melt flow |
| Thick-Wall | > 4 mm | Lower shrinkage |
Material Properties
Thermal Conductivity
I’ve found that materials with high thermal conductivity are fantastic for dissipating heat quickly in thin-wall applications. On the other hand, when working with thick-walled parts, materials with moderate conductivity are better to maintain dimensional stability.
Shrinkage Rate
The shrinkage rate can be a real headache if not properly accounted for. For thin-wall parts, using materials with minimal shrinkage ensures that everything fits just right. For thicker walls, I learned the hard way that careful consideration of post-molding shrinkage is crucial to prevent warping. Consider reviewing careful consideration4 for more insights.
Melt Flow Index (MFI)
High MFI materials are my go-to for thin-wall molding because they fill even the most intricate details quickly. For thick-wall applications, I opt for a lower MFI to ensure consistent pressure throughout the mold.
Material Selection Tips
- For thin-walls, I often choose polycarbonate or ABS due to their excellent flow characteristics.
- When dealing with thick-walls, nylon or polypropylene provide a great balance between strength and flexibility.
Mitigating Defects
I used to struggle with common defects like warping in thick walls or short shots in thin sections until I learned to adjust a few key factors:
- Cooling Time: Ensuring adequate cooling time allows for even heat dissipation.
- Injection Pressure: It’s important to fine-tune this to maintain consistent material flow across varying wall thicknesses.
To delve deeper into these topics, reviewing resources on mold design strategies5 can be incredibly beneficial. This knowledge not only helps in optimizing production but also extends the lifespan of molds.
Thin-wall molding uses materials with high melt flow index.True
High melt flow index allows materials to fill intricate details rapidly.
Thick-wall parts require materials with high thermal conductivity.False
Thick-wall parts benefit from moderate thermal conductivity for stability.
Why Does Injection Pressure Vary Between Thin-Wall and Thick-Wall Parts?
Ever wondered why injection pressure varies so much between thin-wall and thick-wall parts? I have, especially during those late-night design sessions.
Injection pressure varies due to material flow and cooling time differences; thin-wall parts require higher pressure for filling, while thick-wall parts need lower pressure to prevent defects.
Factors Influencing Injection Pressure
In my years working with injection molding6, I’ve learned how crucial injection pressure is. It influences every phase—filling, packing, and cooling. Picture a thin-wall part; it demands rapid material flow to fill those narrow sections. That’s where higher pressures come in. But with thick-wall parts, if I crank the pressure too high, I risk warping or creating voids. Trust me, I’ve had my share of warped prototypes.
| Wall Type | Pressure Requirement | Common Issues |
|---|---|---|
| Thin-Wall | High | Incomplete filling |
| Thick-Wall | Low | Warping and voids |
Injection Pressure for Thin-Wall Parts
Thin-wall components are like a tightrope act—they require precise control over injection pressure to avoid issues like short shots or weld lines. Imagine juggling multiple factors to maintain pressure just right, ensuring the material flows adequately. My trick? Optimizing gate locations7 and runner systems.
Injection Pressure for Thick-Wall Parts
For thick-wall parts, it’s a different game. Here, I often find myself using lower pressures to mitigate internal stresses. It’s all about controlling the cooling rate and ensuring even pressure distribution across the mold. When I first started, I relied heavily on advanced simulation tools8 to achieve uniform cooling—what a lifesaver they were!
Best Practices in Mold Design
Mold design can make or break a project. Over time, I’ve learned to incorporate features like variable wall thicknesses to balance pressure requirements across sections. And sticking to material-specific guidelines9 helps maintain structural integrity throughout the injection process.
When designing for injection molding, considerations such as material type, part complexity, and cooling time become critical. Getting these elements right can boost production efficiency10 and elevate part quality without breaking the bank.
By delving into these aspects, I’ve been able to better anticipate how changes in wall thickness affect injection pressure needs and overall manufacturing outcomes. This understanding has streamlined production processes and improved the quality of the products I work with.
Thin-wall parts require higher injection pressure.True
Thin sections need rapid material flow, necessitating higher pressures.
Thick-wall parts use high injection pressure to prevent warping.False
High pressure in thick walls can cause defects like warping and voids.
What Design Guidelines Should Be Followed for Thin-Wall Parts?
Have you ever tried designing a thin-wall part and found yourself questioning every design decision?
For thin-wall parts, ensure uniform wall thickness, include draft angles, and use ribs for reinforcement to prevent warping and maintain integrity in injection-molded components.

Uniform Wall Thickness
I remember my first project involving thin-wall parts11 like it was yesterday. I had this sleek gadget casing in mind, and the stakes felt high. Keeping a consistent wall thickness became my mantra. It was about ensuring even cooling and avoiding those pesky sink marks or warping that could throw the whole design off. Imagine trying to bake a perfect soufflé—too hot or uneven, and it collapses! The same goes for thin-wall designs. I learned that a uniform thickness helps achieve a balanced flow during the injection molding process, minimizing defects.
| Wall Thickness | Material Type |
|---|---|
| 0.5 – 1.5 mm | ABS |
| 0.7 – 2.0 mm | Polypropylene |
| 0.8 – 2.5 mm | Nylon |
Appropriate Draft Angles
Draft angles were another challenge I had to get comfortable with. During one of my earlier designs, I didn’t incorporate enough angle, and let’s just say, it was like trying to pull a tight sweater over my head—frustrating and near impossible without some damage! Incorporating proper draft angles in the design facilitates easy removal of the part from the mold without damaging its surface.
A typical draft angle ranges between 0.5 to 2 degrees depending on the material used, ensuring the part maintains its shape post-production.
Use of Ribs for Reinforcement
Adding ribs to the design felt like giving my structure a backbone—literally! To improve stiffness without increasing wall thickness, ribs were my go-to. The first time I used ribs was in a smartphone casing design12. I strategically placed them in areas that needed extra support, and it was like fortifying the walls of a castle.
The rib height should be less than three times the wall thickness to avoid flow issues, while rib base width should be around 60% of the wall thickness.
Material Selection
Choosing the right material can feel like finding the perfect partner—it must match your needs and withstand the test of time. High-flow thermoplastics such as Polycarbonate (PC) or Acrylonitrile Butadiene Styrene (ABS) became my trusted allies due to their flow properties that allow thinner walls.
Explore more about material properties13 to determine their suitability for your project needs.
Gate Location Optimization
Optimizing gate locations is like finding the right entry point into a maze. It ensures uniform filling of the mold cavity and reduces defects. Experimenting with different gate locations in simulation software helped me identify optimal positions more times than I can count.
Placing gates at strategic points ensures uniform filling of the mold cavity and reduces likelihood of defects; center gating or edge gating are common strategies that aid in optimizing flow path.
Considerations for Surface Finish
Surface finish isn’t just about looks—it’s about functionality too. I learned this when a client wanted a sleek, polished look but also needed functionality that didn’t scream ‘fragile.’ Textured surfaces can hide flow lines but may require higher draft angles, while smoother finishes might need additional polishing post-molding.
Exploring various surface finish options14 helped me ensure that the design met both aesthetic and functional needs.
Uniform wall thickness prevents warping in thin-wall parts.True
Consistent wall thickness ensures even cooling, reducing warping.
Rib height should be equal to the wall thickness.False
Rib height should be less than three times the wall thickness.
How do production speeds differ between thin-wall and thick-wall molding?
When I first dove into the world of injection molding, I quickly realized that understanding the differences between thin-wall and thick-wall molding could save a lot of time and resources.
Thin-wall molding offers faster production speeds due to quicker cooling and reduced material use, enhancing efficiency, lowering costs, and shortening cycle times compared to thick-wall molding.
Thin-Wall Molding Characteristics
I remember my first experience with thin-wall molding. I was in awe of how fast the process moved. Thin-wall molding, which involves making parts with walls less than 1 mm thick, requires high-speed injection and pressure to fill the mold quickly. The magic here is in the reduced cooling time, which really ramps up production speed.
Advantages of Thin-Wall Molding
- Reduced Cycle Times: The cooling phase15 is impressively short because the thin material dissipates heat so quickly.
- Material Efficiency: You use less material, which not only saves costs but also feels like you’re doing your bit for sustainability.
| Pros | Cons |
|---|---|
| Faster cycle times | Requires high-pressure equipment |
| Material savings | Potential for higher defect rates |
Thick-Wall Molding Characteristics
Thick-wall molding, on the other hand, was a different beast when I tried it. With wall thicknesses over 1 mm, everything seemed to slow down as the material took its time to cool. It demanded careful adjustments in pressure and speed to avoid defects.
Challenges in Thick-Wall Molding
- Extended Cooling Time: I found that the thicker material cooled more slowly, which extended cycle times.
- Potential for Warpage: If the cooling rates weren’t just right, warpage or structural inconsistencies would rear their ugly heads.
Comparing Production Speeds
From my experience, thin-wall molding achieves higher production speeds due to its efficient cooling process, which is a game-changer when manufacturing high-volume, lightweight components like those in consumer electronics. On the flip side, thick-wall molding might be slower but is vital for products needing durability and structural integrity, such as automotive parts.
Deciding between these methods often involves evaluating the specific requirements of your project16. Factors like part design, material selection, and production volume play crucial roles. Balancing speed, quality, and cost can dramatically influence your operation’s success—something I’ve learned the hard way over the years.
Thin-wall molding requires less cooling time.True
The thin material dissipates heat rapidly, reducing cooling time.
Thick-wall molding uses less material than thin-wall.False
Thick-wall molding generally requires more material due to greater thickness.
What Are the Common Challenges in Molding Thin-Wall Parts?
Ever tried molding thin-wall parts? It’s like walking a tightrope!
Common challenges in molding thin-wall parts involve uneven cooling, material flow issues, and cracking. Addressing these requires optimized mold design, effective cooling strategies, and proper material selection.
Uneven Cooling and Its Effects
Let me tell you about the first time I encountered the issue of uneven cooling. I remember feeling both excited and apprehensive as I watched my first thin-wall part come out of the mold. But then, my heart sank as I noticed the warped shape—it was a classic case of uneven cooling causing havoc. Thinner sections cool much faster, leading to warpage and internal stresses that distort the final product.
To tackle this, I quickly learned the importance of enhancing cooling channel designs17 to ensure a uniform temperature distribution across the mold. Using advanced simulation tools became my best friend, allowing me to foresee potential issues before they even cropped up.
| Problem | Solution |
|---|---|
| Warpage | Uniform cooling |
| Internal Stresses | Advanced simulations |
Material Flow Challenges
Then came the battle with material flow. I vividly recall a project where I underestimated the challenges of polymer flow through those thin sections. It was like trying to get honey to flow smoothly through a straw—frustrating and messy! Choosing the right materials with suitable flow properties became crucial in avoiding incomplete fills or surface defects.
I also found that strategically placing gate locations significantly improved flow efficiency. Incorporating dynamic flow analysis18 early in the design process became a game-changer for predicting and mitigating these flow-related challenges.
Cracking Issues in Thin-Wall Parts
Cracking—oh, how it plagued my early days in molding! I learned the hard way that stress concentrations and poor material choices were often the culprits. I remember one particularly heartbreaking moment when a prototype cracked during testing.
Since then, I’ve been employing stress-relief techniques and selecting materials with high impact resistance. It’s also vital to conduct thorough material testing19—something I never skip now—to prevent unforeseen failures. Trust me, understanding these challenges has been key to producing high-quality thin-wall parts. By effectively addressing cooling, flow, and cracking issues, I’ve been able to achieve both functionality and durability in my designs.
Uneven cooling causes warpage in thin-wall parts.True
Uneven cooling leads to different cooling rates, causing warpage.
Material flow issues can cause surface defects.True
Restricted polymer flow results in incomplete fills and defects.
Conclusion
Thin-wall and thick-wall injection molding differ in pressure, cooling rates, and material choices, impacting production speed and part quality. Understanding these differences is crucial for effective design optimization.
-
Discover how injection molding works, including its stages and applications, to better understand its relation to wall thickness. ↩
-
Learn about different materials used in injection molding and their effects on wall thickness and cooling rates. ↩
-
Find out which simulation tools are best for predicting cooling rates and optimizing wall thickness in mold design. ↩
-
Understanding shrinkage rates helps in selecting materials that maintain dimensional accuracy, minimizing post-production defects. ↩
-
Explore mold design techniques that optimize production efficiency and part quality, especially when dealing with varied wall thicknesses. ↩
-
Explore how various parameters in injection molding affect the final product quality, providing practical insights into optimizing production. ↩
-
Discover how optimizing gate locations can enhance material flow and reduce defects in injection molded parts. ↩
-
Learn about advanced simulation tools that can help predict and solve molding issues before they occur. ↩
-
Find guidelines tailored to specific materials that ensure optimal performance and structural integrity of molded parts. ↩
-
Gain insights into strategies for enhancing efficiency in injection molding, reducing costs while maintaining quality. ↩
-
Learn about the specifics of thin-wall injection molding to enhance design efficiency and minimize defects. ↩
-
Understand rib design principles to enhance structural integrity without compromising on wall thickness. ↩
-
Discover high-flow thermoplastics suitable for thin-wall applications and their properties. ↩
-
Explore different surface finish options and their impact on product aesthetics and function. ↩
-
Understanding the cooling phase is key to optimizing cycle times and reducing defects in injection molding processes. ↩
-
Guidance on selecting the right molding process can enhance product quality and manufacturing efficiency. ↩
-
This link provides insights into optimizing cooling channels, crucial for preventing warpage in thin-wall parts. ↩
-
Learn about dynamic flow analysis techniques to address material flow challenges efficiently. ↩
-
Discover the significance of thorough material testing to prevent cracking in molded parts. ↩