
3D printing, or additive manufacturing1, is transforming the mold making process2 by offering unprecedented speed, cost savings, and design flexibility. This technology enables the creation of molds directly from digital designs, reducing lead times and allowing for complex geometries that were previously unattainable. Whether you’re in prototyping, small-scale production, or customization, 3D printing3 can streamline your workflow and cut costs significantly.
3D printing creates molds faster and cheaper than traditional methods, ideal for prototyping and small runs, but may face material and durability challenges for large-scale production.
Understanding how 3D printing integrates into mold making is crucial for leveraging its full potential. This guide will walk you through the essentials, from basic concepts to practical applications, helping you decide when and how to adopt this revolutionary technology.
3D printing reduces mold production time from weeks to hours.True
Traditional mold making can take weeks, while 3D printing can produce molds in a matter of hours, depending on complexity.
3D printed molds are always suitable for high-volume production.False
While excellent for prototyping and small runs, 3D printed molds may lack the durability needed for large-scale manufacturing.
What is 3D Printing in Mold Making?
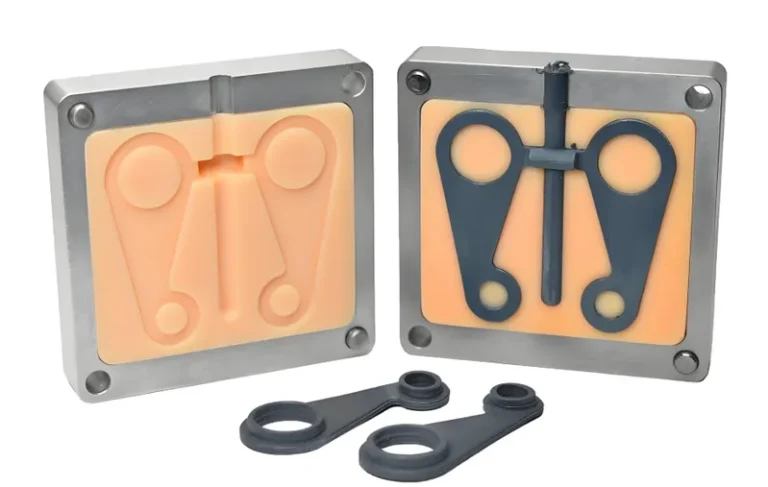
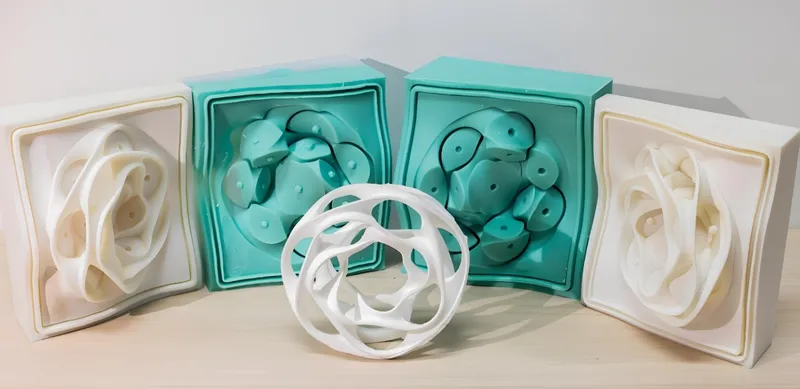
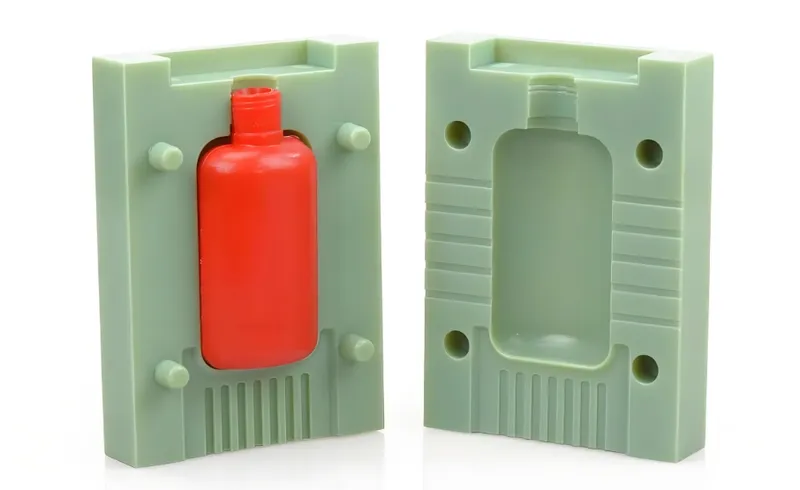
3D printing in mold making refers to the process of creating molds using additive manufacturing techniques, where materials are built layer by layer based on a digital model. This approach contrasts with traditional subtractive methods, such as CNC machining, which remove material from a solid block.
3D printing, or additive manufacturing, creates molds by depositing materials layer by layer, enabling rapid production and complex designs for prototyping and small-scale manufacturing.
| Aspect | 3D Printed Molds4 | Traditional Molds |
|---|---|---|
| Production Time | Hours to days | Weeks to months |
| Cost | Low for small runs | High initial cost, better for large runs |
| Design Flexibility | High (complex geometries possible) | Limited by machining constraints |
| Durability | Less durable for high-volume use | Highly durable, long-lasting |
Core Principles
- Layer-by-Layer Construction5: Molds are built by adding material in thin layers, allowing for intricate details and internal features.
-
Digital Design6: Molds are designed using CAD software, enabling quick iterations and customization.
-
Material Versatility: Various materials like plastics, resins, and even metals can be used, depending on the application.
Classification
- By Process:
- Fused Deposition Modeling (FDM) for larger molds.
- Stereolithography (SLA) for high-detail molds.
- Selective Laser Sintering (SLS) for durable, heat-resistant molds.
-
By Materials:
- Plastics (PLA, ABS, PETG) for low-temperature casting.
- Resins for high-detail applications.
- Metals for high-temperature or high-pressure needs.
-
By Applications:
- Prototyping for rapid design testing.
- Small-scale production for limited runs.
- Customization for unique or bespoke items.
3D printing allows for mold designs that are impossible with traditional methods.True
Additive manufacturing enables complex internal structures and undercuts without additional tooling.
All 3D printing processes are suitable for mold making.False
Different processes have varying strengths; for example, FDM is better for larger molds, while SLA excels in detail.
How Does 3D Printing Benefit Mold Making?
3D printing offers significant advantages in mold making, particularly in reducing lead times and costs for prototyping and small production runs. It also enables greater design freedom, allowing for innovation in product development.
3D printing in mold making7 cuts lead times, reduces costs for small runs, and enables complex designs, but may not be ideal for high-volume or high-temperature applications.
Typical Application Scenarios
-
Rapid Prototyping8: Quickly create molds to test designs, reducing development cycles.
-
Custom Molds9: Ideal for industries like jewelry, dentistry, or aerospace, where unique parts are required.
-
Small Batch Production: Cost-effective for producing limited quantities without the need for expensive tooling.

-
Educational Tools: Teach mold making in academic or workshop settings.
-
Art and Design: Enable artists to create unique, one-off pieces affordably.
Pros and Cons Comparison
| Aspect | 3D Printed Molds | Traditional Molds |
|---|---|---|
| Speed | Hours to days (Nexa3D Guide) | Weeks to months |
| Cost | Low for prototypes and small runs | High initial cost, better for large runs |
| Design Flexibility | High (complex geometries possible) | Limited by machining constraints |
| Durability | Less durable for high-volume use | Highly durable, long-lasting |
| Material Compatibility | Limited by printer materials | Wide range, including metals |
| Customization | Easily modified | Costly to modify |
3D printing is always cheaper than traditional mold making.False
While cost-effective for small runs, traditional methods may be more economical for large-scale production due to durability.
3D printed molds can handle the same production volumes as traditional molds.False
3D printed molds are typically less durable and may not withstand the rigors of high-volume manufacturing.
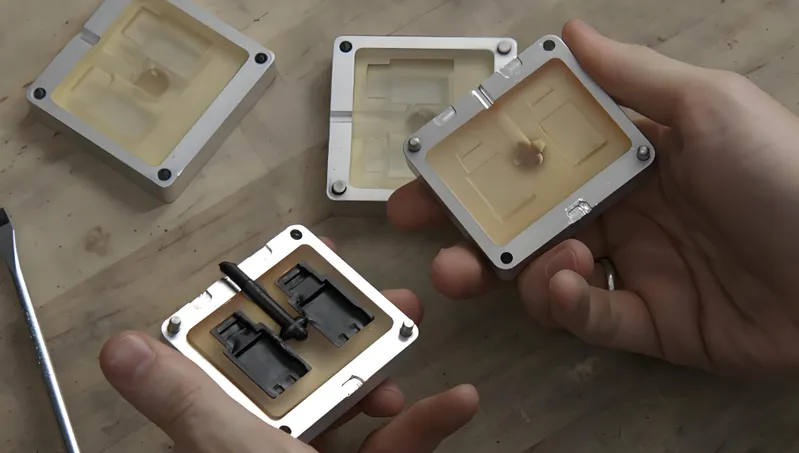
What is the Workflow for 3D Printing Molds?
The workflow for 3D printing molds involves several key steps, from design to post-processing, each critical to ensuring the mold’s quality and functionality.
The 3D printing mold workflow includes designing in CAD, selecting the right technology and material, printing, post-processing, and casting, with key parameters like layer height and print orientation affecting the outcome.

Process Full Workflow Breakdown
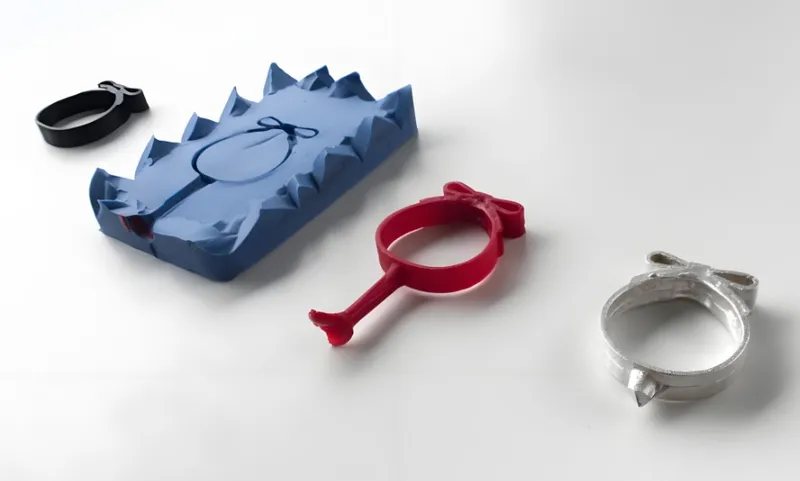
- Design the Mold:
- Use CAD software (e.g., Autodesk Fusion, SolidWorks) to create the mold design.
- Incorporate draft angles, parting lines, runners, sprues, and vents (Xometry Guide).
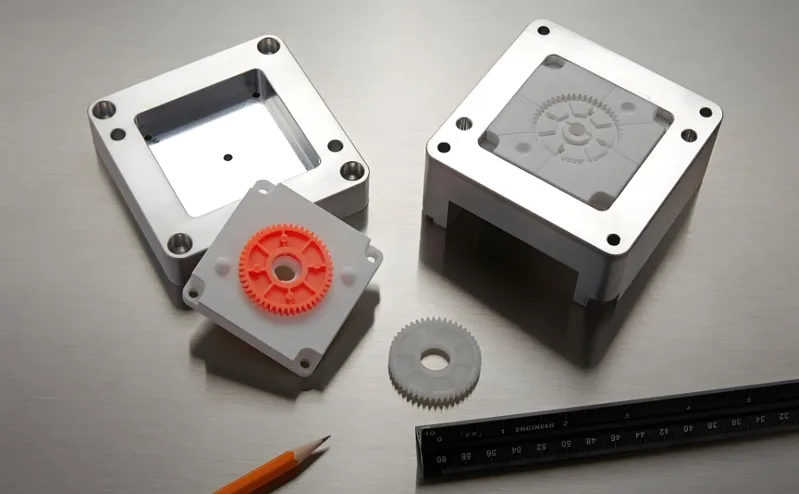
- 3D Print the Mold:
- Choose the appropriate technology: FDM for larger molds, SLA for high detail (Prusa Guide).
- Select materials based on casting needs (e.g., PLA for low-temperature casting, resins for detail).

-
Post-Processing:
- Sand and polish for a smooth surface (Instructables Guide).
- Apply release agents to prevent sticking.
-
Casting:
- Pour casting material (e.g., wax, concrete, metal) into the mold.
- Allow setting or curing time.
-
Demolding:
- Remove the cast part.
- Clean the mold for reuse if applicable.
Key Parameters
-
Layer Height: Affects surface finish and detail; lower heights (e.g., 0.1mm) provide better resolution.
-
Infill Density: Determines mold strength; higher infill (e.g., 50-100%) for durability.
-
Print Orientation: Position to minimize supports and ensure structural integrity.

Material Compatibility
-
Plastics (PLA, ABS, PETG): Suitable for low-temperature casting (e.g., wax, soap) (Rocketry Forum).
-
Resins: High detail for intricate molds but brittle (MEXA3D Guide).
-
Specialized Materials: High-temperature plastics or resins for demanding applications (Nexa3D Guide).
Post-processing is optional for 3D printed molds.False
Post-processing, such as sanding, is often necessary to achieve a smooth surface for casting.
All 3D printed molds require the same material.False
Material choice depends on the casting material and application; for example, PLA for wax casting, resins for detailed molds.
What Tools and Tips Can Enhance 3D Printed Mold Making?
Practical tools and guidelines are essential for optimizing the 3D printing process in mold making, ensuring successful outcomes and informed decision-making.
Use a design checklist for 3D printed molds and a decision-making guide to choose between 3D printing and traditional methods, considering factors like production volume and complexity.
Design Checklist
-
Draft Angles: Include angles (e.g., 2-5°) for easy demolding.
-
Parting Lines: Define clear lines for mold splitting.
-
Vents: Add small channels to release air during casting.
-
Runners/Sprues: Design wide enough channels for material flow.
-
Wall Thickness: Maintain 2-4 mm for strength, adjust based on material.
-
Print Orientation: Position to minimize supports and enhance durability.
Process Selection Decision-Making
| Criteria | 3D Printed Molds10 | Traditional Molds11 |
|---|---|---|
| Production Volume12 | Prototyping, small runs | Large-scale production |
| Complexity | Complex geometries | Simple to moderate designs |
| Lead Time | Critical deadlines | Flexible timelines |
| Material Needs | Low-temperature casting | High-temperature/pressure casting |
3D printing is always the best choice for mold making.False
While advantageous for certain scenarios, traditional methods may be more suitable for high-volume or high-durability needs.
A design checklist can prevent common mistakes in 3D printed mold making.True
Following a checklist ensures critical design elements like draft angles and vents are included, reducing errors.
How Does 3D Printing Fit into the Broader Mold Making Landscape?
3D printing is part of a larger ecosystem of technologies that support mold making, from design to production.
3D printing integrates with upstream technologies like CAD and 3D scanning, and downstream processes like casting and post-processing, forming a comprehensive mold making workflow.

Related Technologies
- Upstream:
- CAD Software: Essential for designing molds (Autodesk Fusion, Tinkercad).
- 3D Scanning: Digitize objects for mold creation.
- Simulation Software: Test designs virtually before printing.
- Downstream:
- Casting Technologies: Injection molding, sand casting, lost-wax casting.
- Post-Processing: Polishing, curing for finished parts.
- Material Science: Understanding casting material properties.
3D printing eliminates the need for traditional casting methods.False
3D printing complements traditional casting by providing molds, but casting is still necessary for the final product.
Integrating 3D printing with other technologies enhances mold making efficiency.True
Combining 3D printing with CAD, scanning, and simulation streamlines the entire process from design to production.
Conclusion
3D printing is revolutionizing mold making by offering faster production times, lower costs for small runs, and the ability to create complex designs. While it may not yet replace traditional methods for high-volume manufacturing, its benefits for prototyping, customization, and small-scale production are undeniable. By understanding the workflow, material choices, and practical tools, you can leverage 3D printing to enhance your mold making process.
Explore the potential of 3D printing for your next project and see how it can transform your approach to mold making.
-
Learn how additive manufacturing can revolutionize your mold making with speed and cost efficiency. ↩
-
Discover the steps involved in the mold making process with 3D printing for better production insights. ↩
-
Explore the advantages of 3D printing in mold making to understand how it can enhance your production process. ↩
-
Explore the benefits of 3D Printed Molds to understand how they can revolutionize your production process. ↩
-
Learn about Layer-by-Layer Construction to grasp its significance in creating complex designs and prototypes. ↩
-
Discover how Digital Design enhances the 3D printing process, allowing for rapid iterations and customization. ↩
-
Explore this link to understand how 3D printing revolutionizes mold making, enhancing efficiency and creativity in production. ↩
-
Learn about rapid prototyping to see how it accelerates product development and reduces costs in various industries. ↩
-
Discover the diverse applications of custom molds in 3D printing and how they cater to specific industry needs. ↩
-
Explore the benefits of 3D printed molds, including speed and design flexibility, which can revolutionize your production process. ↩
-
Understanding the limitations of traditional molds can help you make informed decisions about your production methods. ↩
-
Learn how production volume influences the choice between 3D printed and traditional molds for optimal efficiency. ↩